5 Mail Organization Ideas Kitchen Counters Need to Look Instantly Less Chaotic
Your kitchen counter was supposed to hold a cute fruit bowl and maybe a candle. Instead, it’s starring in a one-woman show called Where Did All This Mail Come From? Bills, coupons, school flyers, random receipts from three weeks ago… it piles up fast.
The good news? You do not need a giant mudroom or some Pinterest-perfect butler’s pantry to fix it. You just need a few smart mail organization ideas kitchen counters can actually handle without looking like a mini post office.
Let’s make that paper clutter chill out already.
1. Create A Drop Zone That Looks Intentional
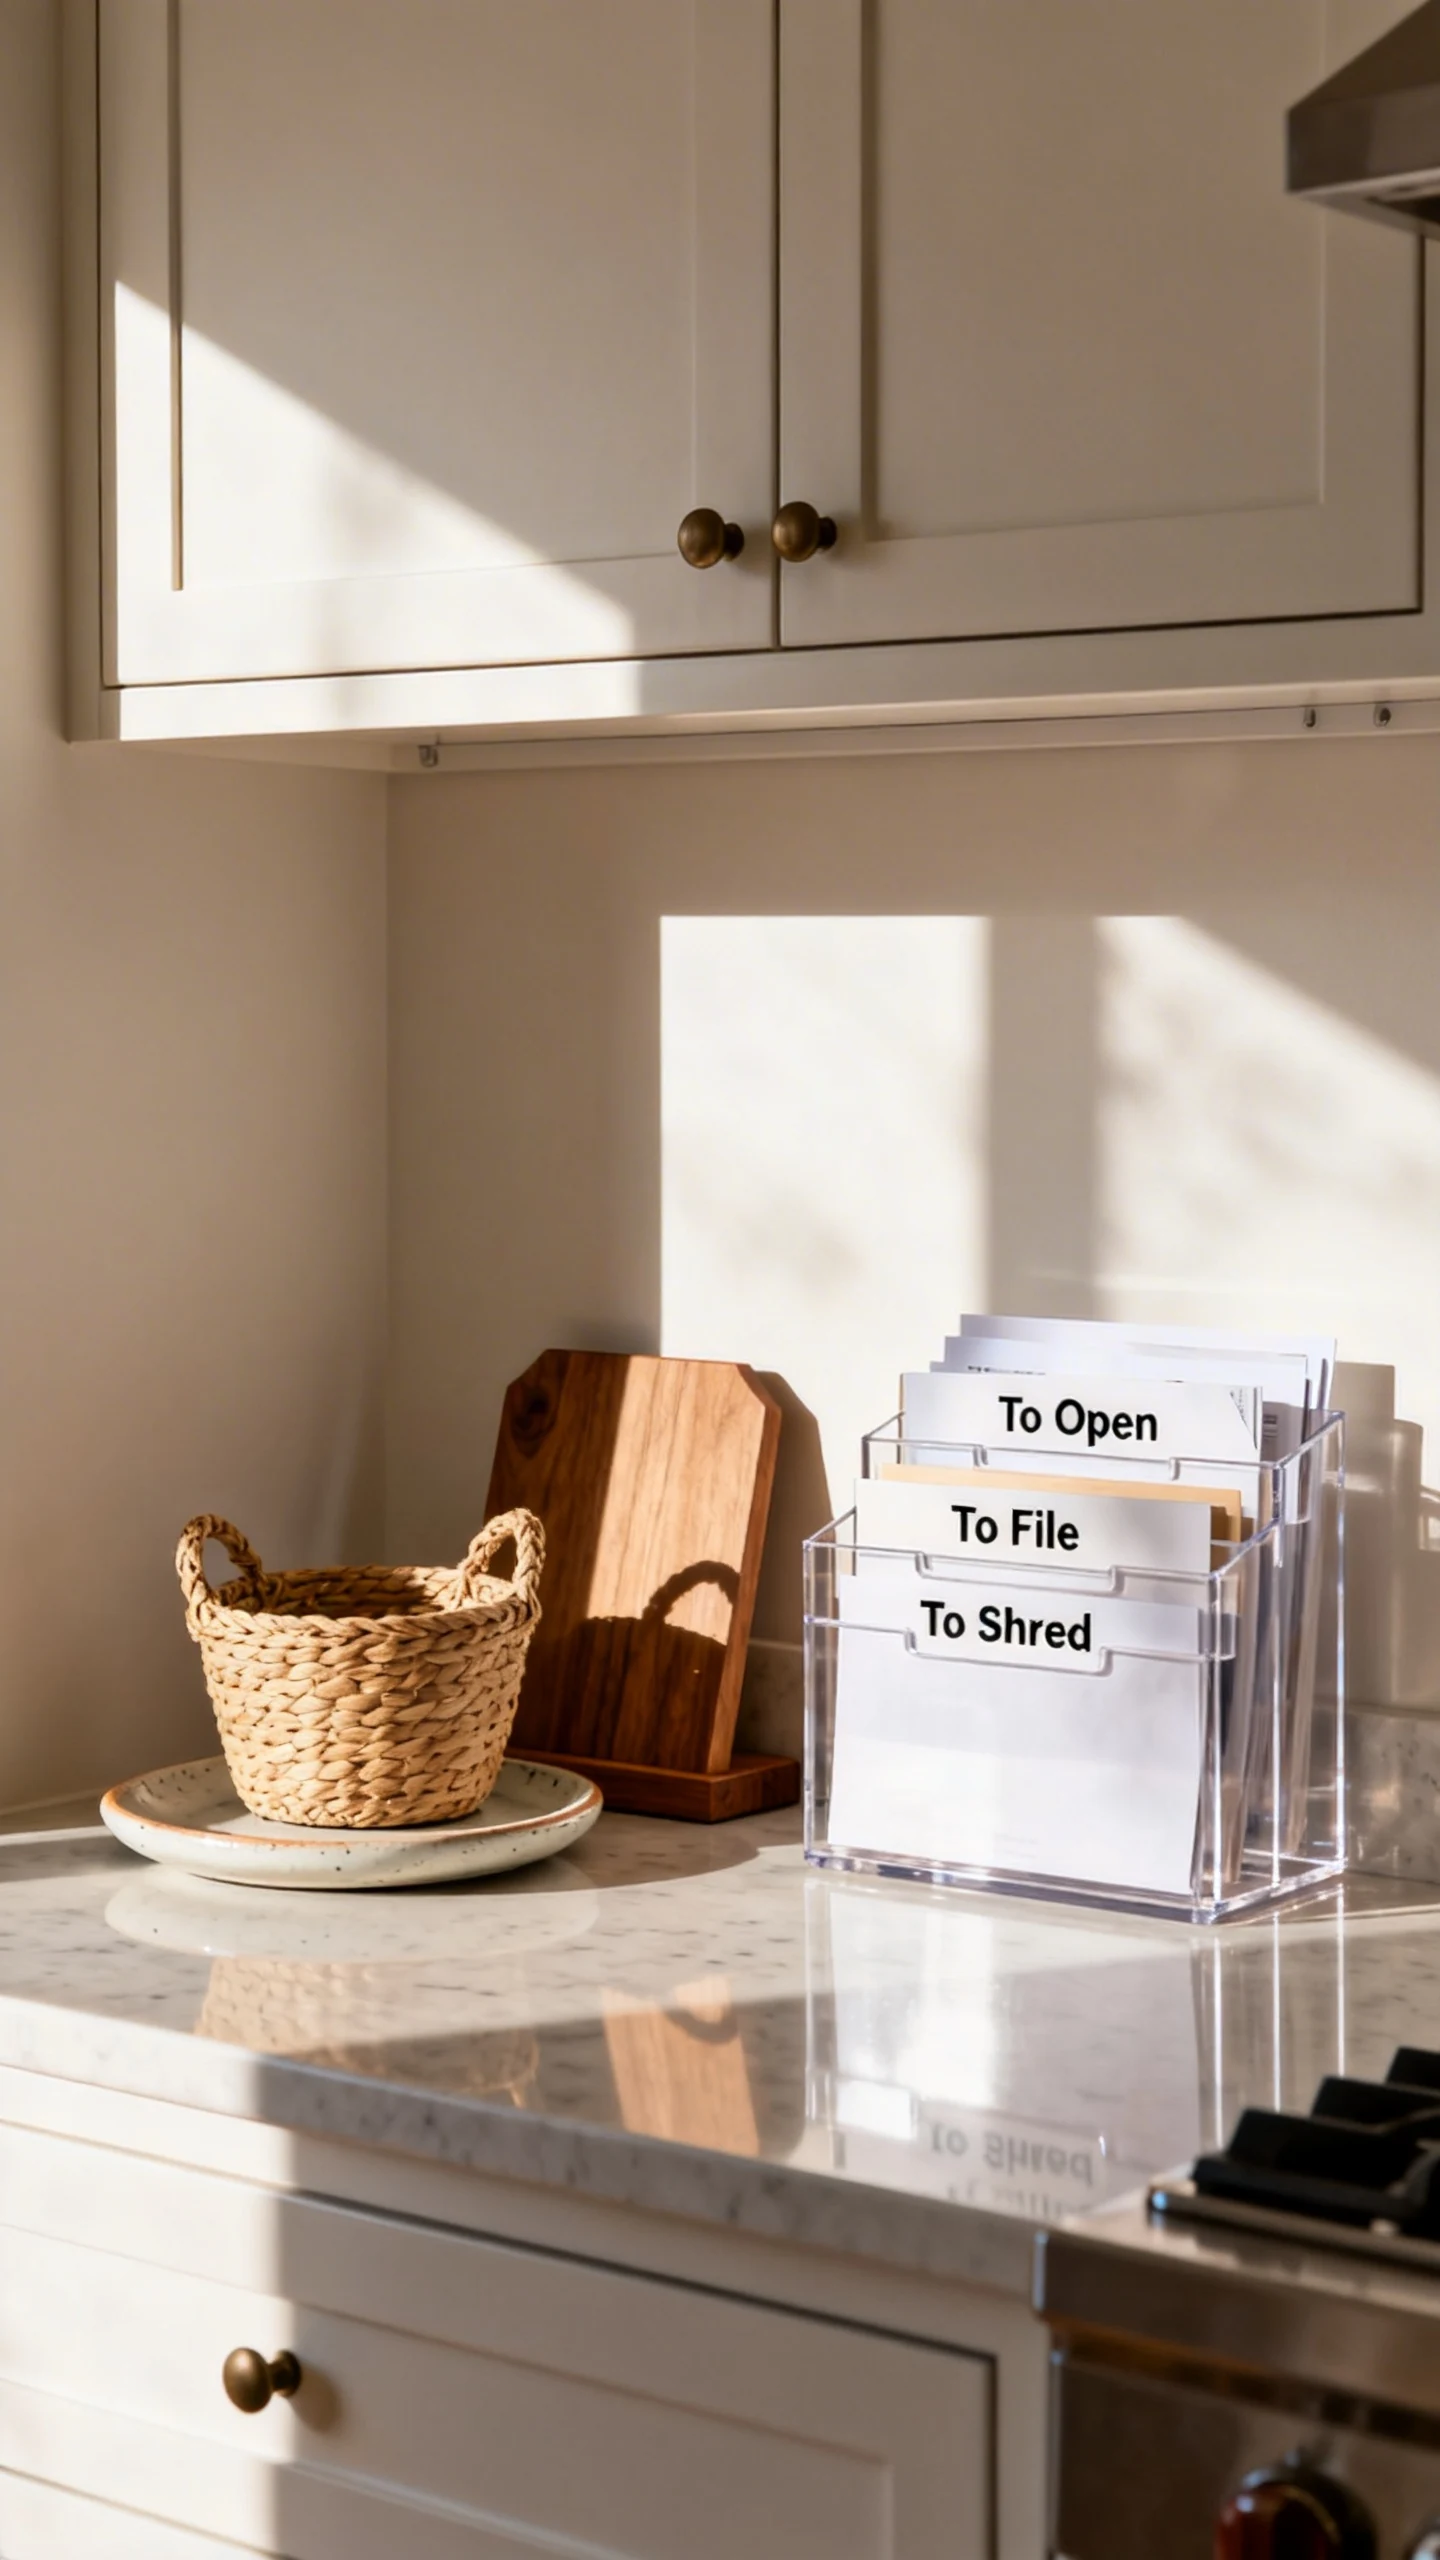
If your mail currently lands wherever gravity feels inspired, start here. A dedicated mail drop zone gives every envelope a home the second it enters the kitchen.
And yes, this matters. Because once paper touches the counter and blends into the background, it somehow becomes permanent decor. Rude.
What To Use For A Countertop Drop Zone
Pick one container that fits your style and your space. Keep it pretty enough that it feels like decor, not office overflow.
- A woven basket for a warm, relaxed look
- A ceramic tray for a cleaner, more polished vibe
- A wooden letter holder for farmhouse or classic kitchens
- An acrylic sorter if you love modern, barely-there organization
The trick is to keep it small. If the container is huge, you’ll treat it like a storage unit instead of a temporary landing spot.
Make It Work Harder
Want this to actually solve the mess instead of just relocating it? Add simple limits.
- Choose a sorter with 2 to 3 slots max
- Label sections like To Open, To File, and To Shred
- Place it near the usual entry point for mail, not five counters away
FYI, the easier it is to toss mail in the right spot, the more likely you’ll keep doing it. Nobody wants a system that feels like homework.
2. Use A Vertical Sorter To Free Up Counter Space
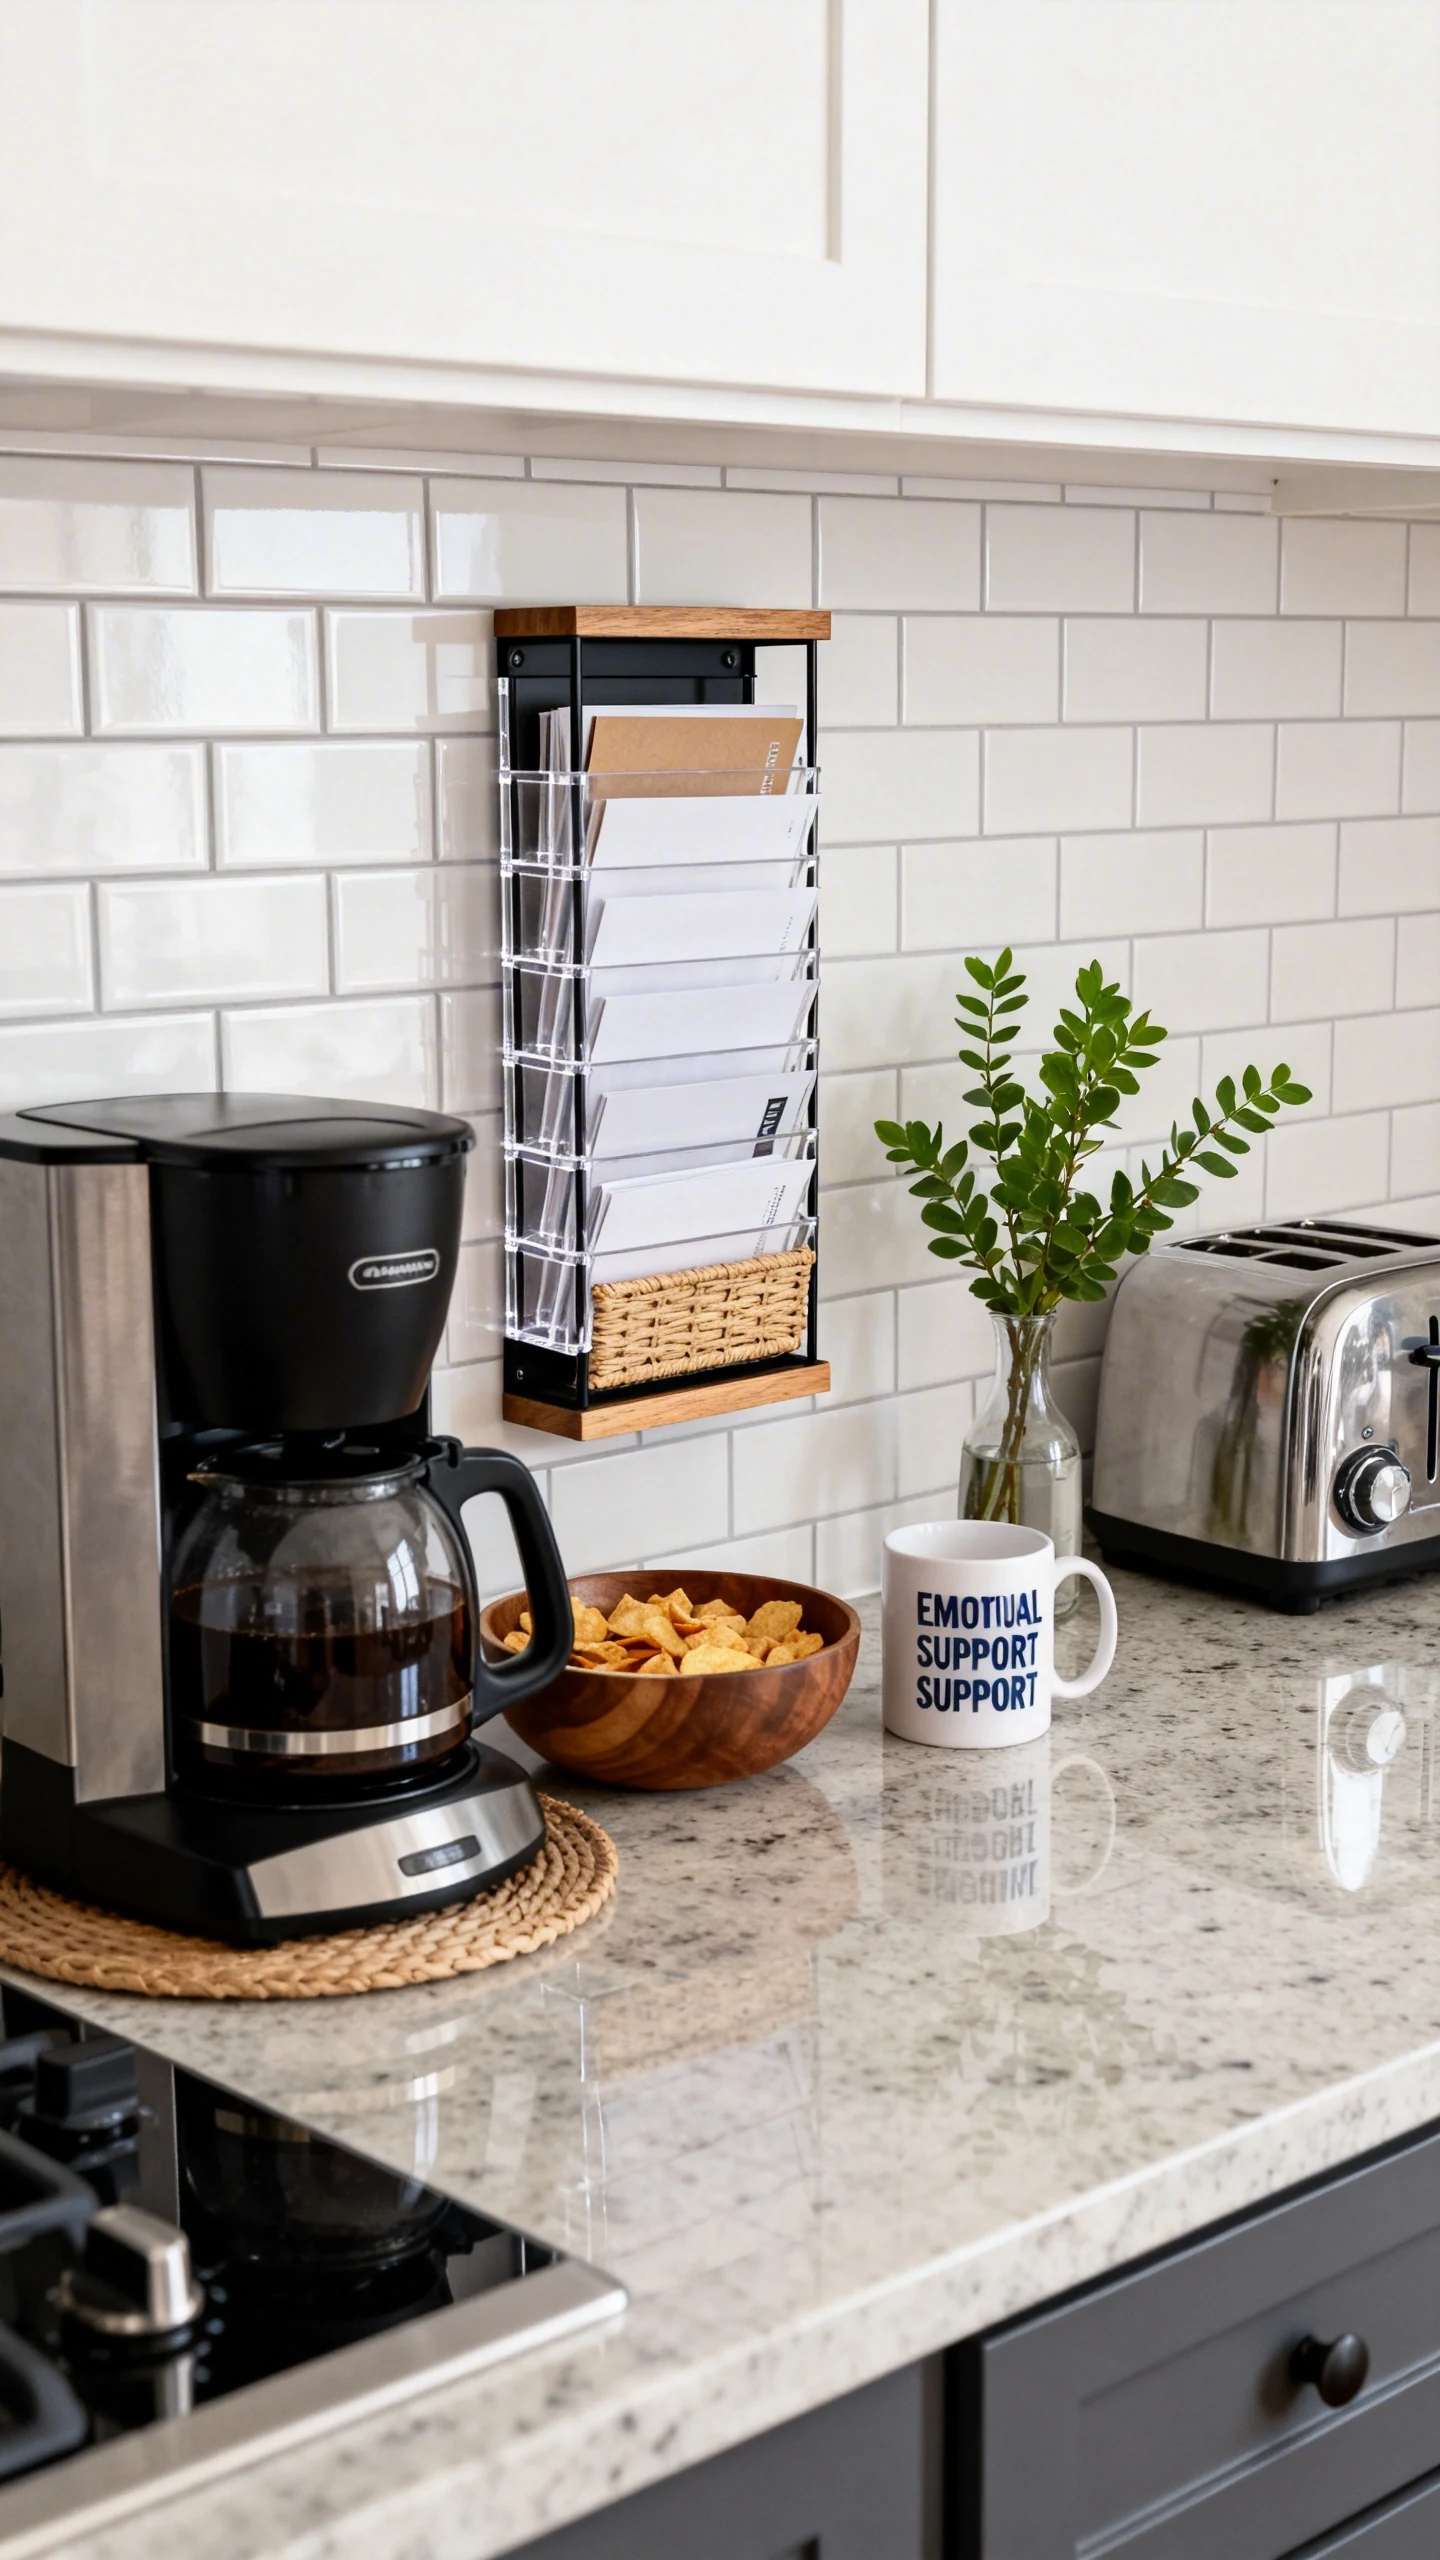
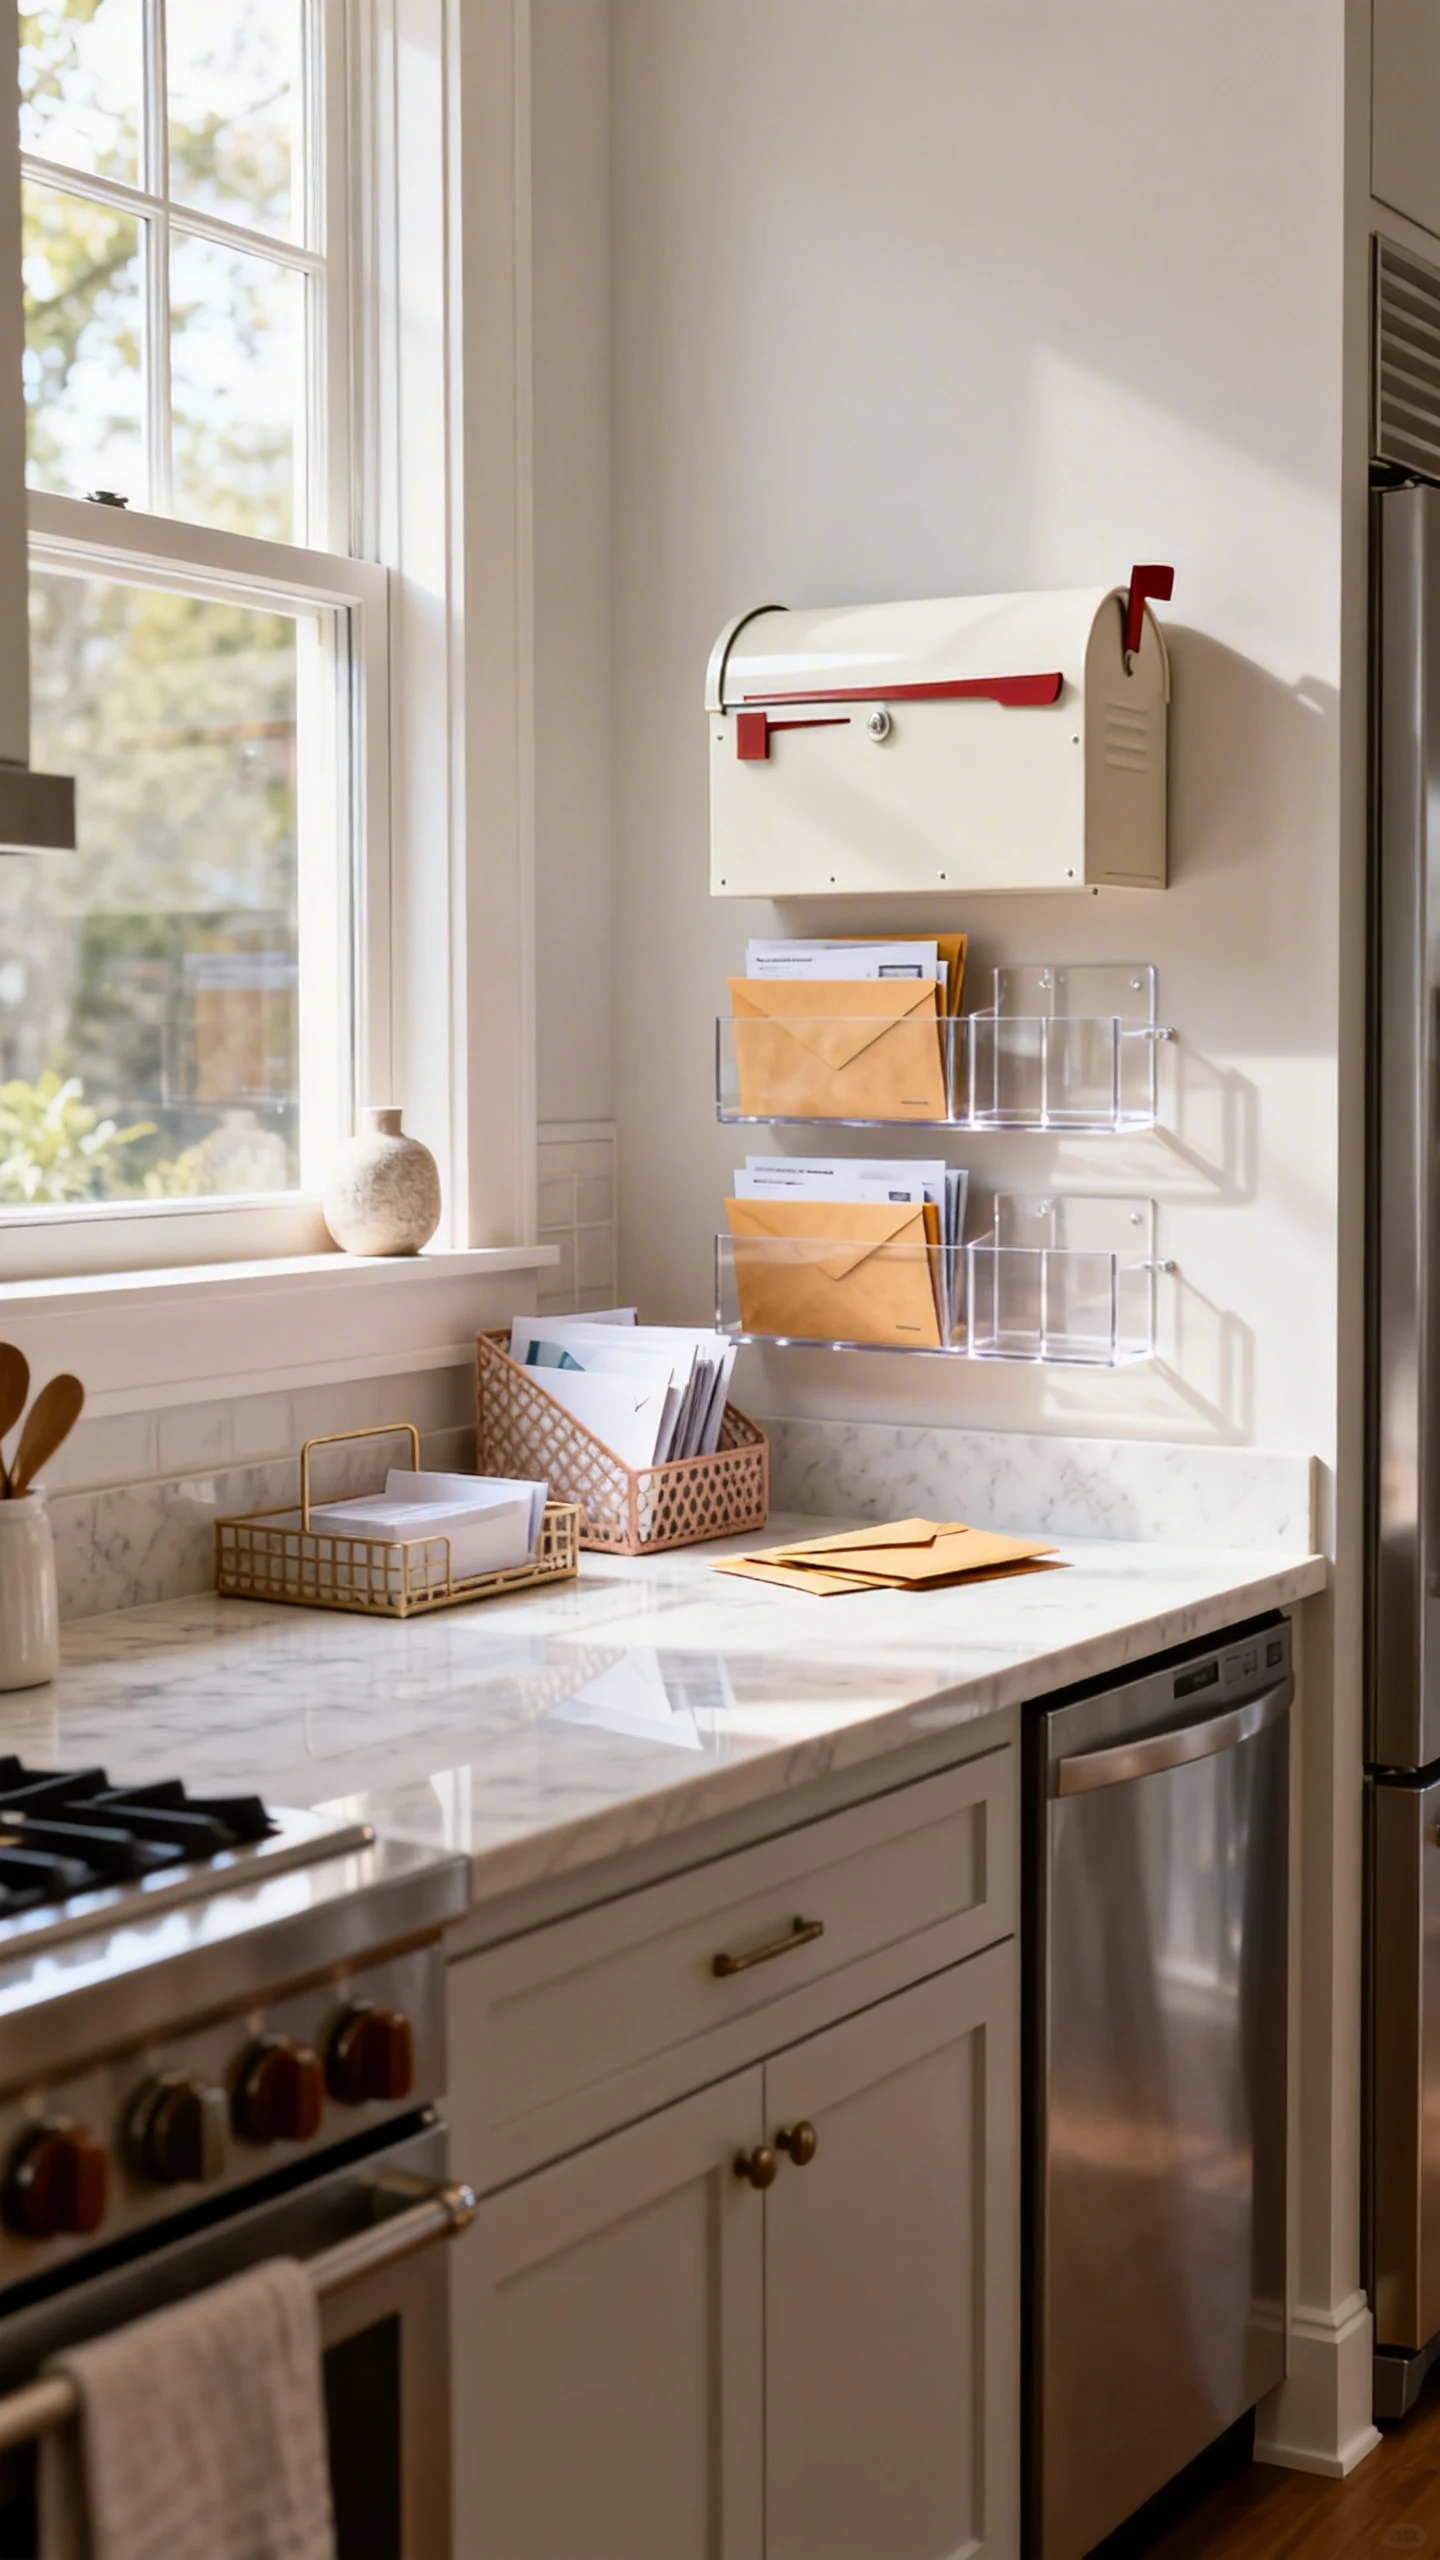
If your counter is already doing a lot, like holding a coffee maker, toaster, snack bowl, and your emotional support mug, go vertical. A vertical mail organizer gives you storage without eating up valuable surface area.
This is one of those sneaky-smart moves that makes your kitchen look calmer almost instantly. Less spread-out paper equals less visual chaos. Love that for you.
Best Vertical Options For Kitchen Counters
You’ve got choices, and they do not have to look boring.
- Tiered file holders that stack mail neatly upward
- Wall-adjacent countertop organizers that sit flush against the backsplash
- Magazine files repurposed for larger envelopes and school papers
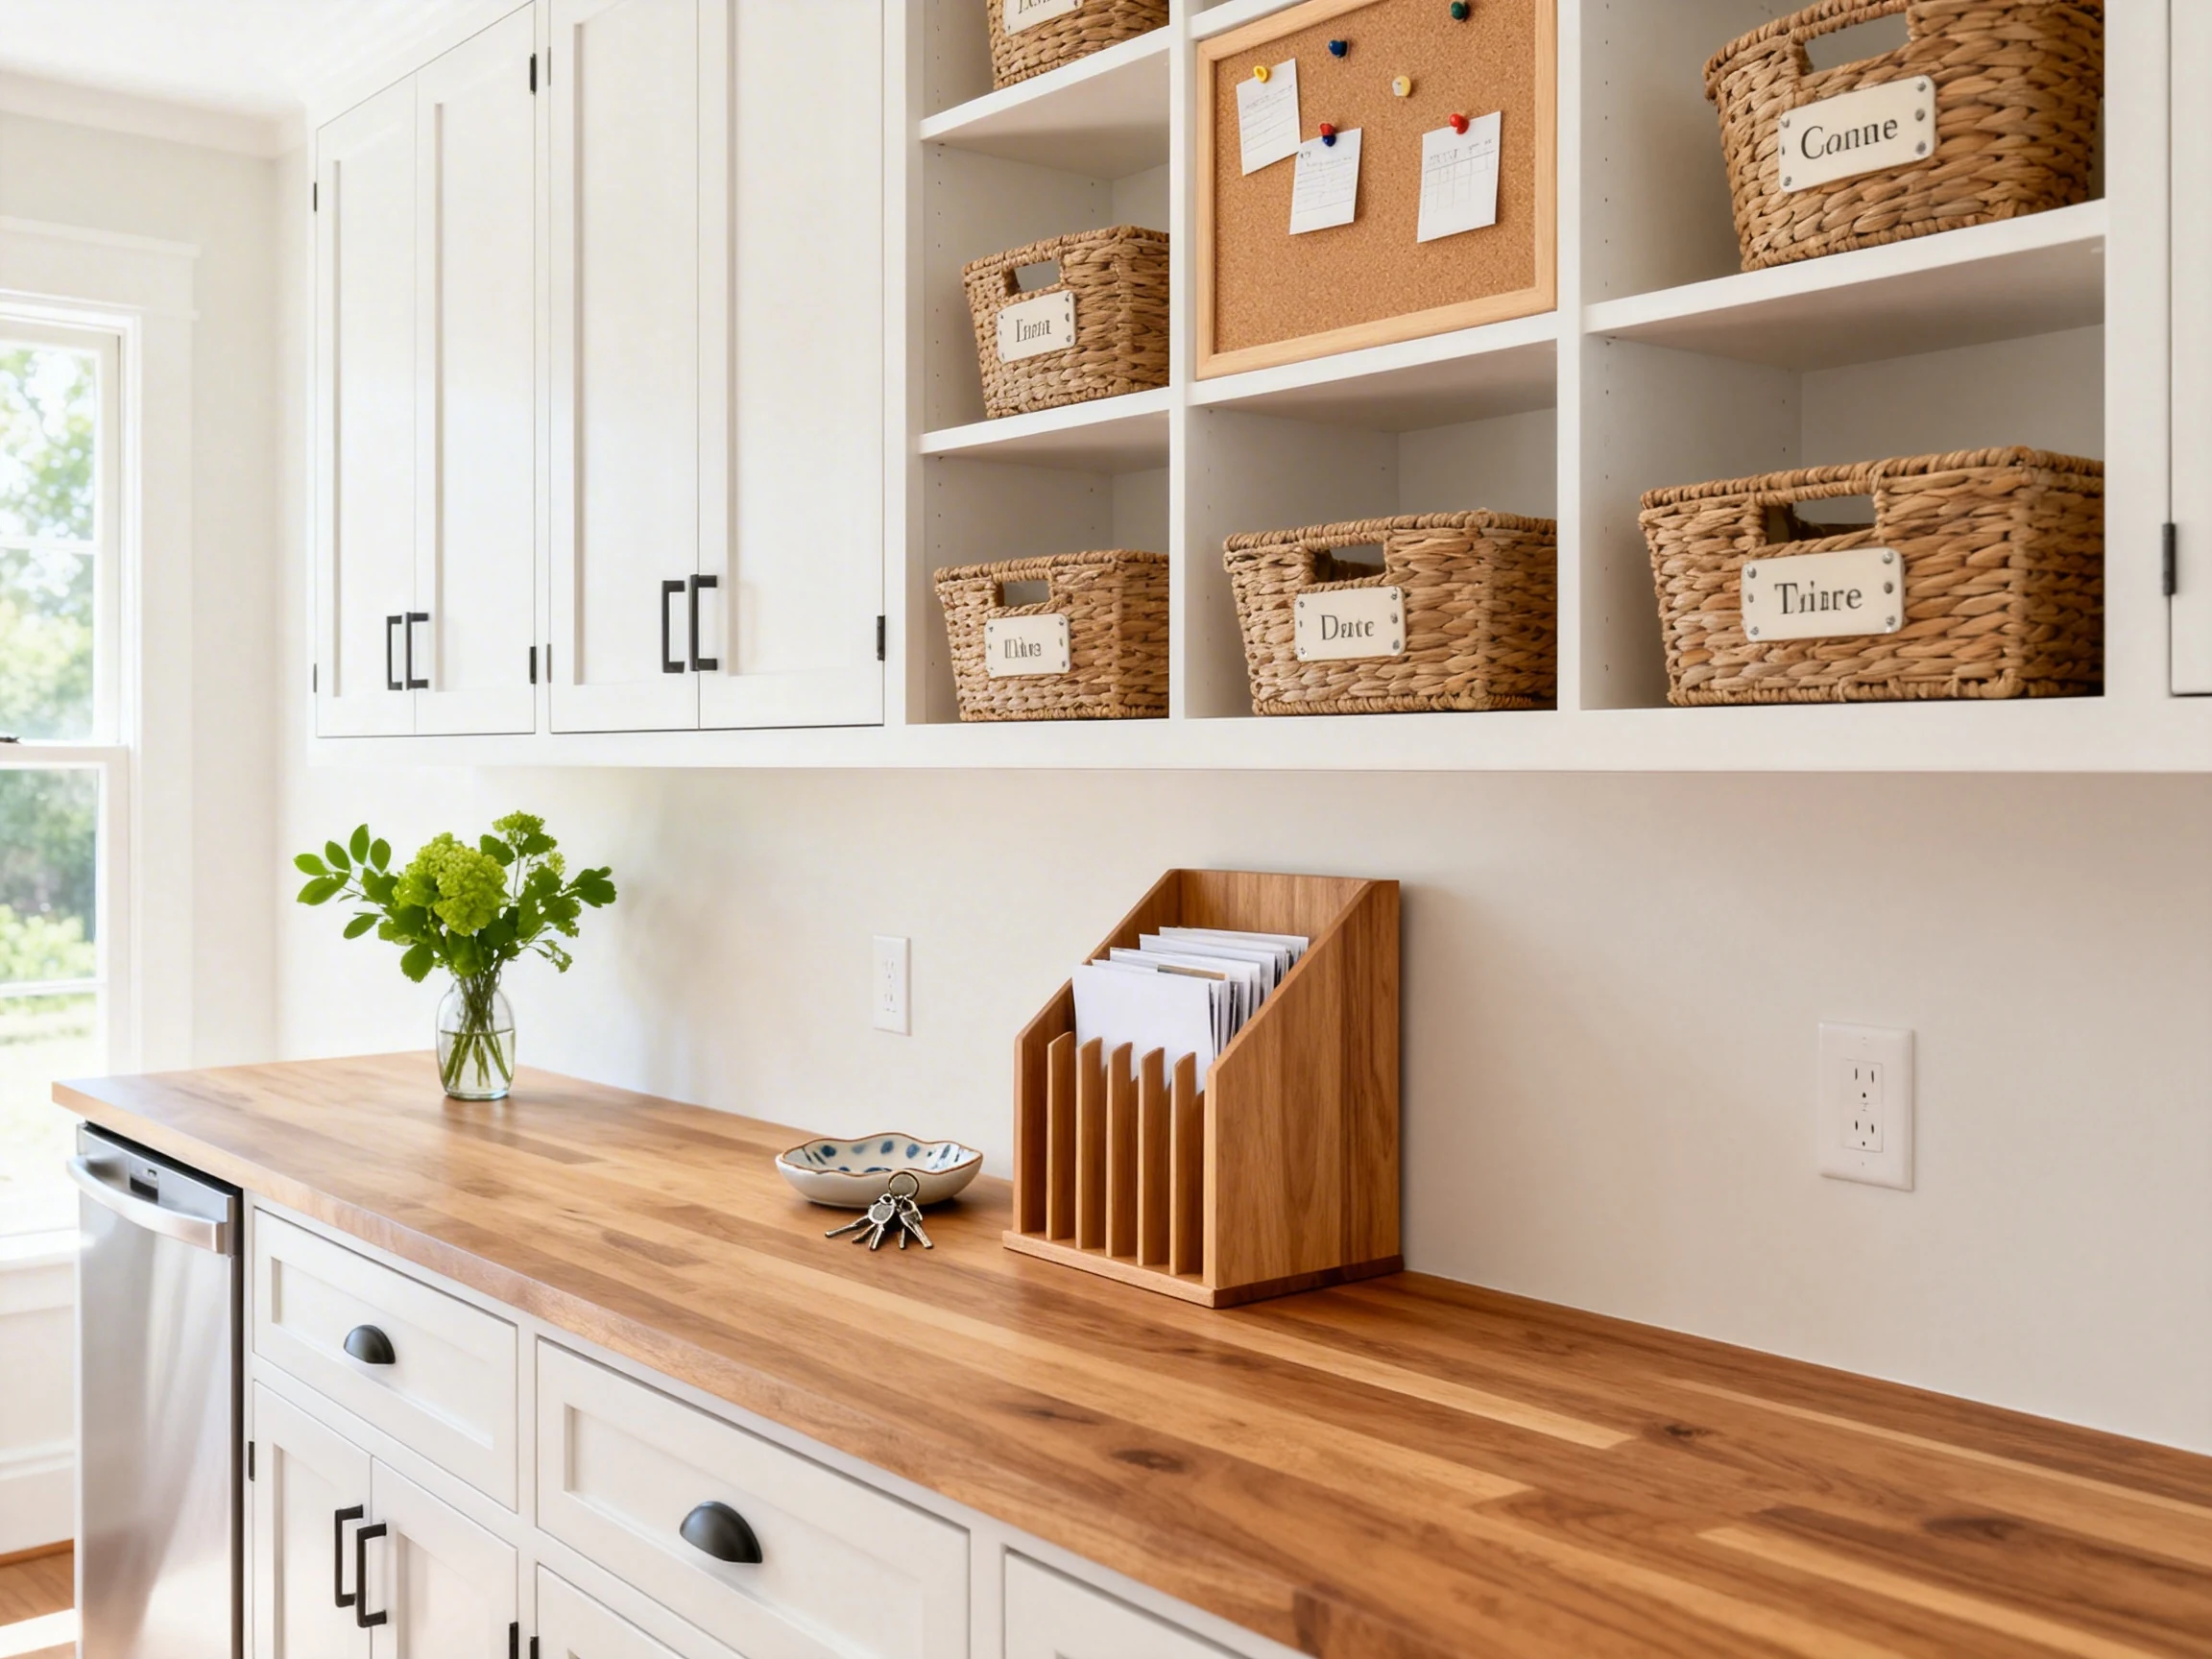
- Open wood cubbies for a more decorative, furniture-like feel
If your kitchen leans modern, go for matte black metal or clear acrylic. If it’s cozy or traditional, wood and rattan will feel way more at home.
Style Tip: Blend It Into The Kitchen
The secret is making the organizer look like it belongs with the rest of your decor. Match finishes to nearby accents like cabinet hardware, light fixtures, or utensil crocks.
You can even style the area around it with one or two intentional pieces:
- A small vase with greenery
- A compact lamp if you have a built-in nook
- A decorative bowl for keys or loose change
Just don’t add so much stuff that your organization station becomes clutter with branding. IMO, that defeats the point.
3. Split Mail Into Daily, Weekly, And Action Piles
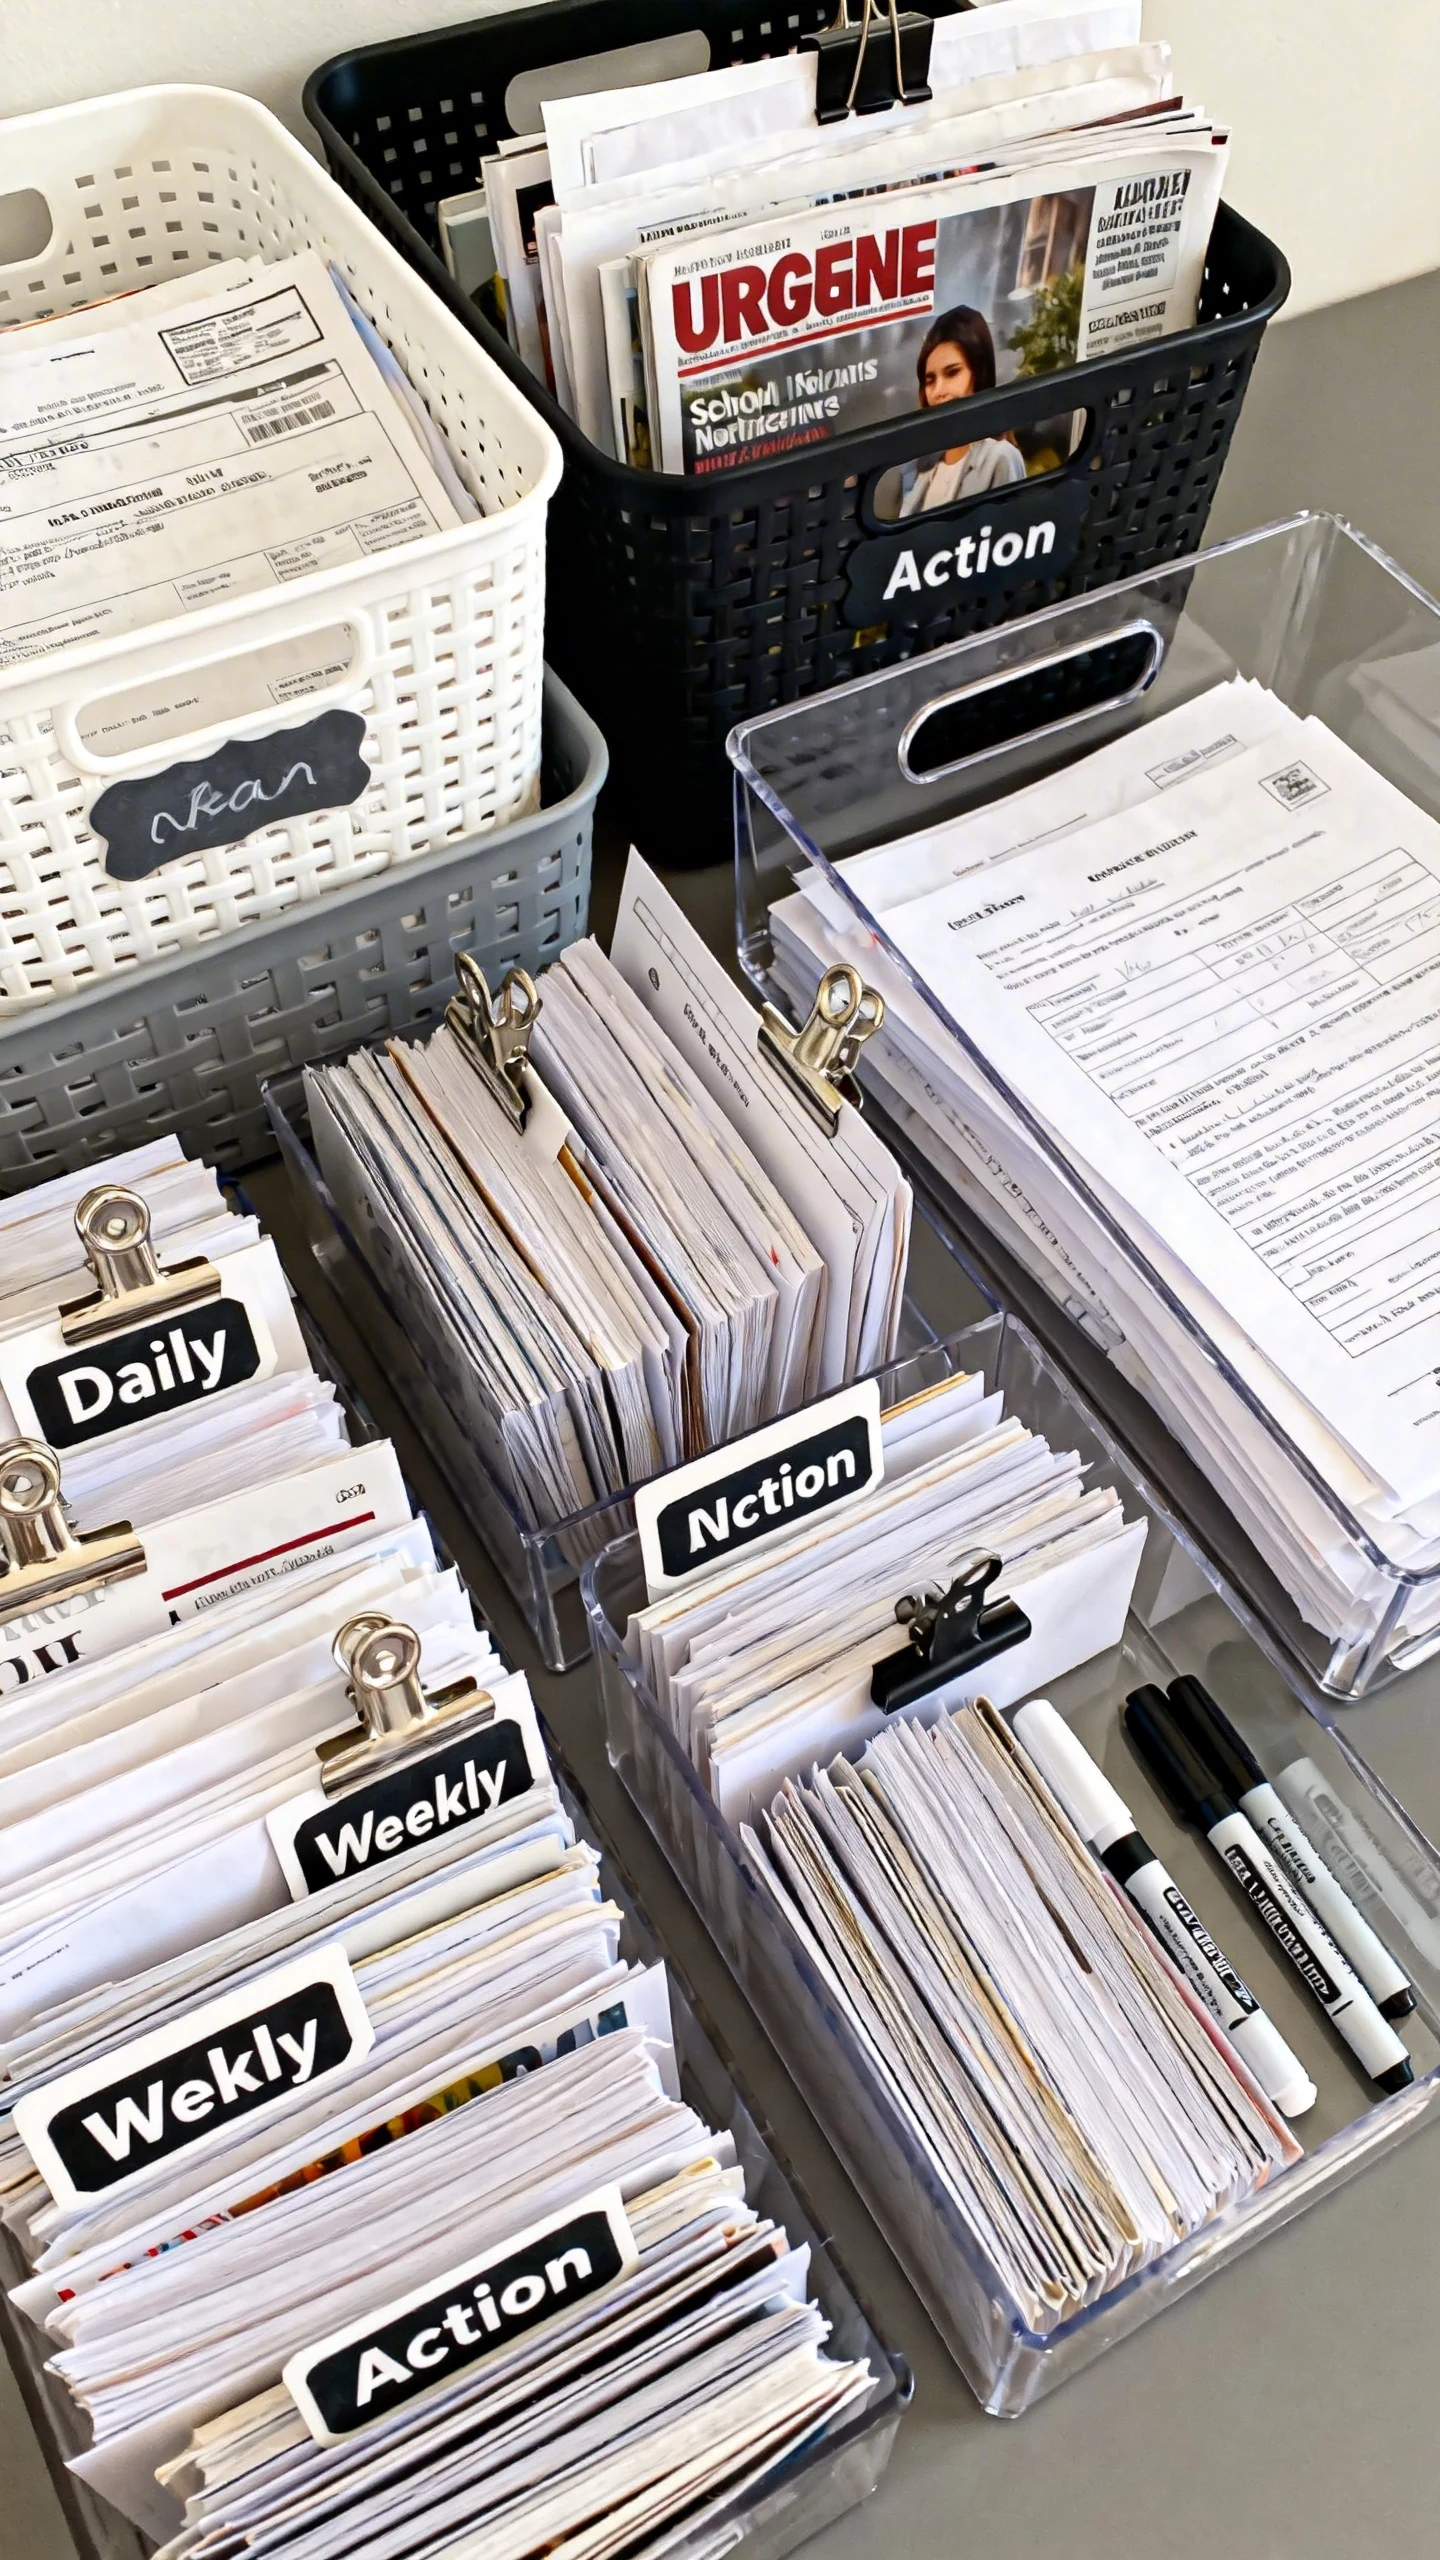
Here’s where most people get stuck. They have a bin, maybe even a cute one, but everything still sits there forever because all paper gets treated the same.
Not all mail deserves equal attention. A pizza coupon is not on the same level as a bill with an actual due date. Your counter knows this. Let’s catch up.
A Smarter Sorting Method
Create three categories based on when you need to deal with the paper, not just what type it is. This makes the system way easier to maintain.
- Daily: urgent items, invitations, forms, time-sensitive bills
- Weekly: magazines, school notices, papers you need soon but not today
- Action: anything requiring a signature, payment, call, or follow-up
This setup works especially well if multiple people in the house touch the mail. Translation: fewer “I thought you handled it” moments.
Make The Categories Obvious
If you have to think too hard about where something goes, the system won’t last. Keep the labels bold and dumb-simple.
Try using:
- Clip-on tags for baskets or bins
- Vinyl labels on acrylic organizers
- Mini chalkboard markers if you like changing categories
You can also color-code if that helps. White for daily, gray for weekly, black for action. Chic and practical? We love a multitasker.
And if you really want to stay ahead of the mess, do a five-minute reset every evening. Open, sort, toss junk. Done.
4. Hide The Ugly Stuff In Stylish Covered Storage
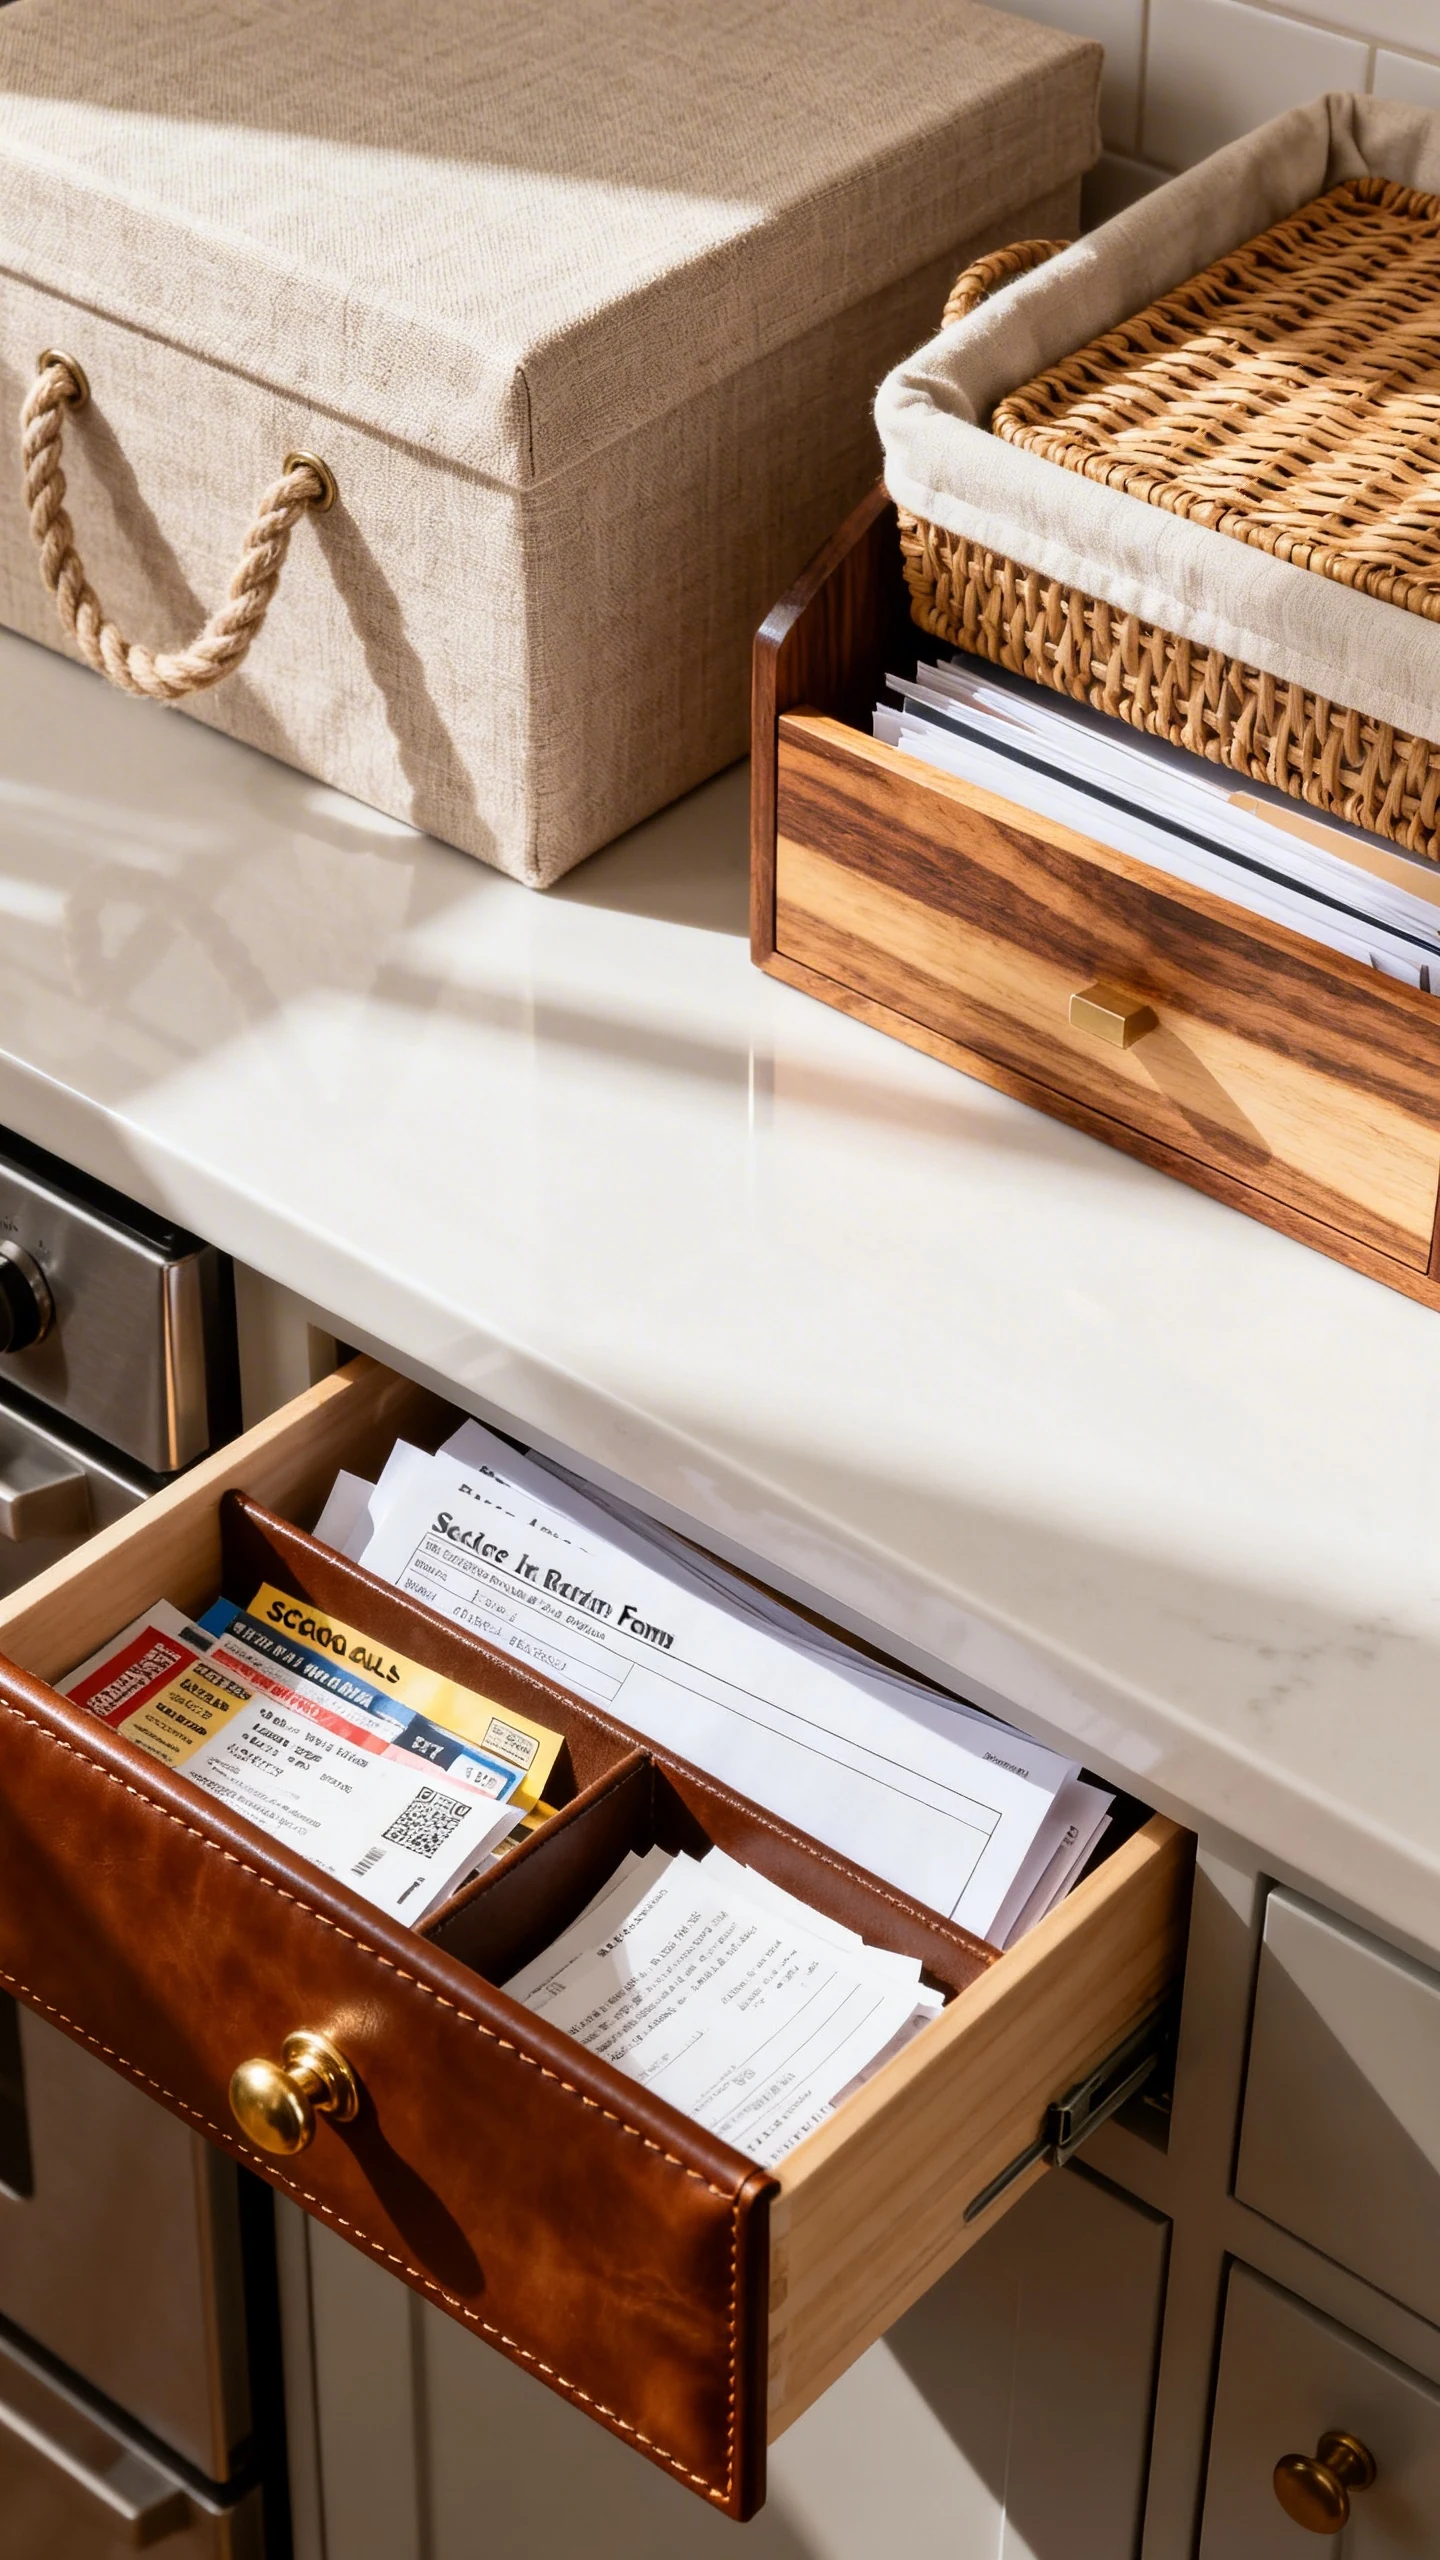
Some mail is just not cute. Sorry to the utility bill, but it’s bringing absolutely nothing to the kitchen aesthetic.
For the papers you need to keep temporarily but don’t want to stare at, use covered storage. This keeps counters looking clean while still making the documents easy to grab.
Pretty Storage That Doesn’t Scream “Paperwork”
Covered boxes and lidded containers are perfect for the mail you’ve already sorted but haven’t fully dealt with yet. Think tax paperwork, pending forms, receipts, and those instruction manuals you swear you’ll need someday.
- Decorative boxes in linen, wood, or faux leather
- Lidded baskets for a softer, more casual look
- Recipe boxes repurposed for small paper categories
- Drawer-style desktop organizers for a more polished setup
Keep one on the counter only if it truly matches your decor. Otherwise, tuck it into a nearby cabinet and let the visible counter organizer handle the day-to-day stuff.
What To Store Out Of Sight
Covered storage works best for papers that matter but do not need your eyeballs every hour.
- Coupons you actually use
- Receipts for returns
- School forms waiting for submission
- Household paperwork you’ll file later
The key word is temporary. This is not your forever archive. It’s just a stylish middle ground between total chaos and a full filing cabinet situation.
5. Add A Tiny Mail Command Center With Essentials
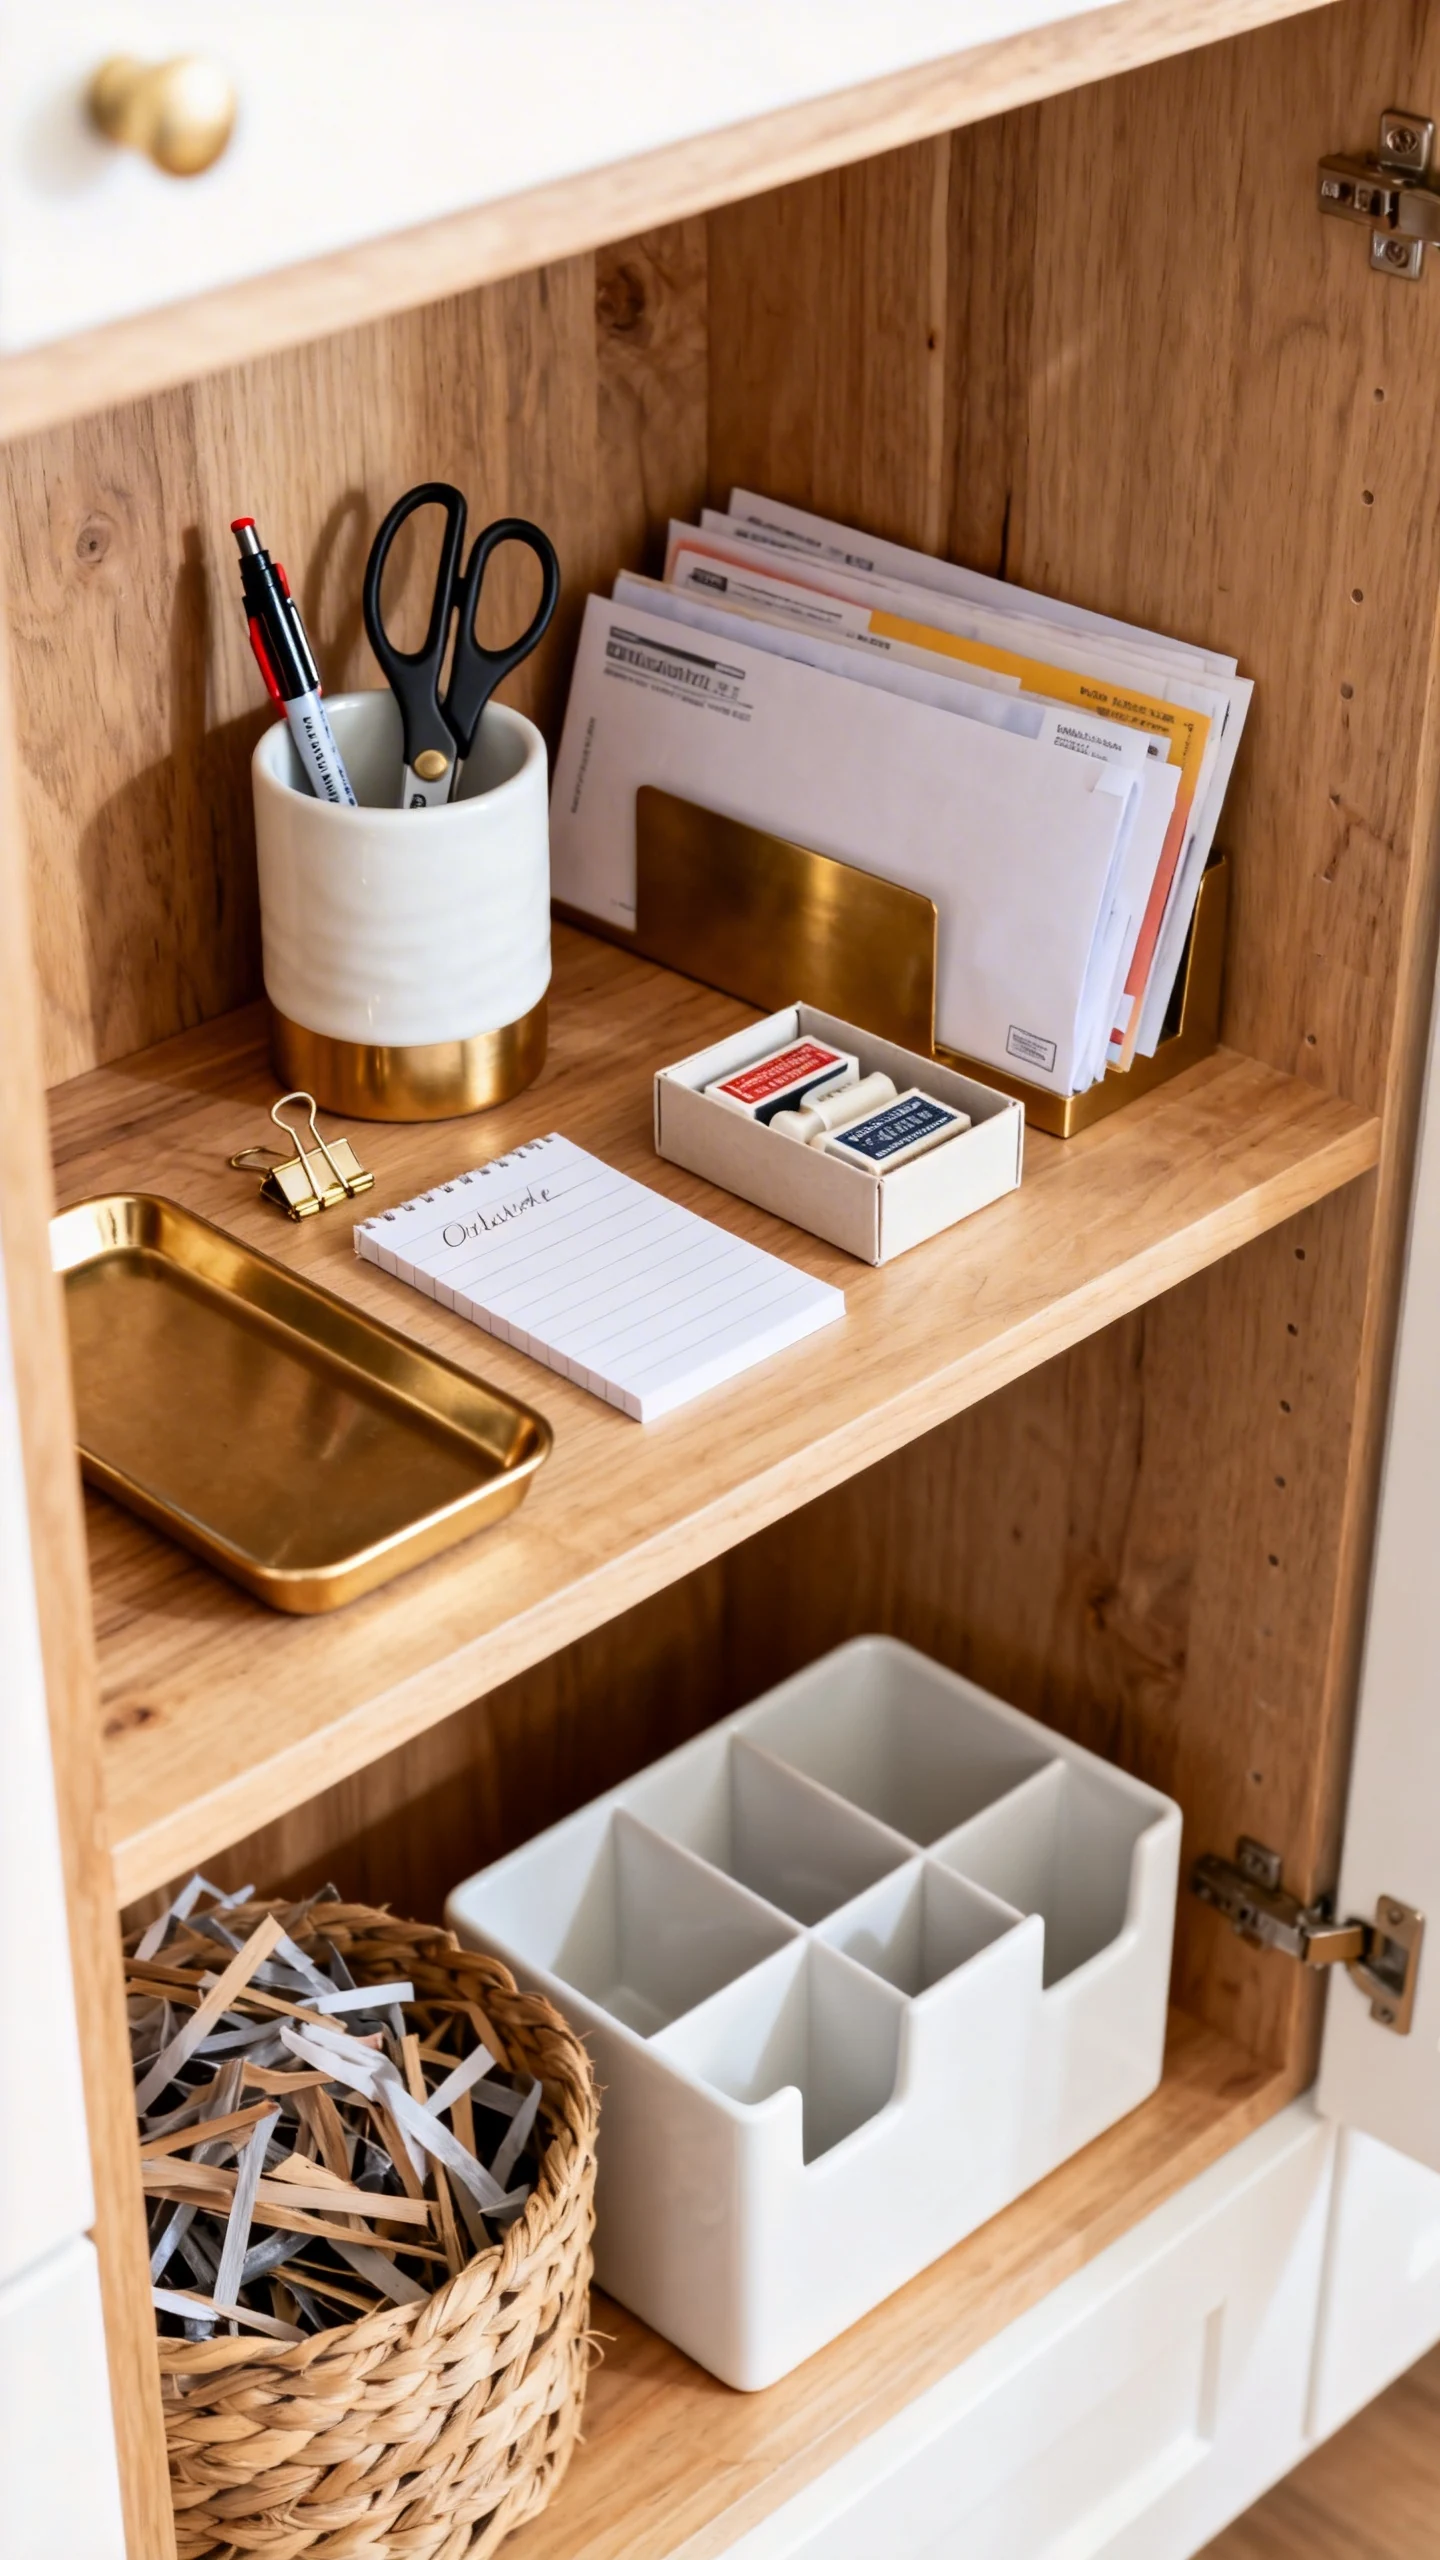
If mail tends to explode across the counter because you’re always hunting for a pen, scissors, or stamps, it’s time for a mini command center. This is the kitchen-counter version of getting your life together without being dramatic about it.
When all the tools live right next to the mail, you can handle things immediately. Open it, sign it, shred it, recycle it. Boom.
What To Include In Your Mail Station
Keep it compact. You are building a tiny efficiency zone, not opening a branch office.
- A pen cup with 2 to 3 reliable pens
- Small scissors or a letter opener
- A notepad for reminders and due dates
- Stamps in a small box or drawer
- A shred pile or easy access to a nearby shredder
If you have room, add a compact tray for outgoing mail. That way, anything that needs to leave the house stops haunting your counter for days.
Keep It Cute, Not Cluttered
This is where restraint matters. Use matching containers or a single divided caddy so the setup feels cohesive.
Some easy ways to keep it stylish:
- Stick to one material palette, like wood, brass, and white ceramic
- Use low-profile organizers so nothing blocks sightlines
- Edit often and remove random extras before they multiply
A command center should make your life easier, not become another messy corner you avoid making eye contact with. Harsh but fair.
At the end of the day, the best mail organization ideas kitchen counters can use are the ones you’ll actually stick with. Keep it simple, make it pretty, and give every paper a clear place to land.
You do not need a giant renovation or some flawless influencer kitchen to pull this off. Just a few smart systems, a little consistency, and maybe the courage to throw out that expired coupon collection.
Your counters deserve better. And honestly, so does your stress level.